In part 3 of the PyBites Banner Generator article series I show you how to automatically generate a banner with Requests and Selenium.
For both scripts I used Click to build the CLI interface.
The code for this tutorial is on Github.
Requests
Julian showed us some time ago How to Use Python Requests on a Page Behind a Login. It showed how we could POST to a webpage, pretty cool. I took this concept and wrote a quick interactive script to POST to the PyBites Banner Generator form and retrieve the generated banner:
-
Posting to a page is easy, use requests’
Sessionobject passing it headers and a payload dict with user data (POST parameters):session = requests.Session() request = session.post(BANNER_APP, headers=HEADERS, data=payload) -
As detailed in part 2 the Flask app returns the generated png image upon form submission. With the POST request we are effectively submitting the form so the repsonse object holds the banner image. To retrieve it just write the
request.contentto a file. As the image is binary don’t forget to usewb:with open(outfile, 'wb') as f: f.write(request.content)And that’s all there is to it.
Requests + Selenium == selenium-requests
Having achieved that I wanted to get a private PyBites banner. As detailed in part 2 to use PyBites logos we need to login (this is one of our ‘live’ tools).
Although you can perfectly use requests to login to your site as well, I wanted to try Selenium for this version. After all we use this module for this week’s code challenge. To use requests in Selenium there is a nice package called selenium-requests that:
Extends Selenium WebDriver classes to include the request function from the Requests library, while doing all the needed cookie and request headers handling.
Awesome!
It was friendly to use, see the code here.
Some notes, also on how I used click:
-
clickis your friend to build robust CLI interfaces. For example the username and password can be retrieved from ENV variables with:@click.option('-u', '--username', envvar='USERNAME') @click.option('-p', '--password', envvar='PASSWORD')Want a choice list? No problem:
@click.option('-l', '--logo', type=click.Choice(PYBITES_PILLARS))Or a boolean field? Add this:
@click.option('-b/-nb', '--background/--no-background', default=False, prompt=True) -
We wrap these user inputs (payload) in a data dict and we login to the site with a helper method:
driver = login(username, password)To enter data and submit just find the element for which Selenium has quite a few helper methods and use
send_keys, then click the Login button (xpath only needed because the lack of HTML id/name attributes):username_field = driver.find_element_by_name('username') username_field.send_keys(username) password_field = driver.find_element_by_name('password') password_field.send_keys(password) # TODO: need html id/name on button btn_xpath = "//button[contains(@class, 'pure-button-primary')]" login_btn = driver.find_element_by_xpath(btn_xpath) login_btn.click()After this login click the driver keeps this logged in state in its session.
-
As selenium-requests uses Requests under the hood, the POST request and response handling is identical to the first script:
request = driver.request('POST', BANNER_APP, data=data) ... with open(outfile, 'wb') as f: f.write(request.content) -
Finally note that I am using the headless (no browser) PhantomJS. If you use the code for your own site behind login you might need to install it separately.
Let’s try it
This is Click’s out-of-the-box niceness:
$ python private_banner.py  --help
Usage: private_banner.py [OPTIONS]

Options:
-n, --name TEXT
-l, --logo [news|challenge|special|article]
-i, --image TEXT
-t, --text TEXT
-b, --background / -nb, --no-background
-o, --outfile TEXT
-u, --username TEXT
-p, --password TEXT
--help                          Show this message and exit.
Note that I set username and password in my env:
$ env |egrep 'USERNAME|PASSWORD'
PASSWORD=...
USERNAME=...
Let’s create a banner for this article:
$ python private_banner.py -n selenium-requests \
-l article -i https://pbs.twimg.com/media/C7bRQMoXUAEqTbI.jpg \
-t 'Fully Automate Login and Banner Generation with Selenium, Requests and Click' \
-b -o selenium-requests-banner.png
And voilà:

Going to the GUI we see that the image persisted in the DB:
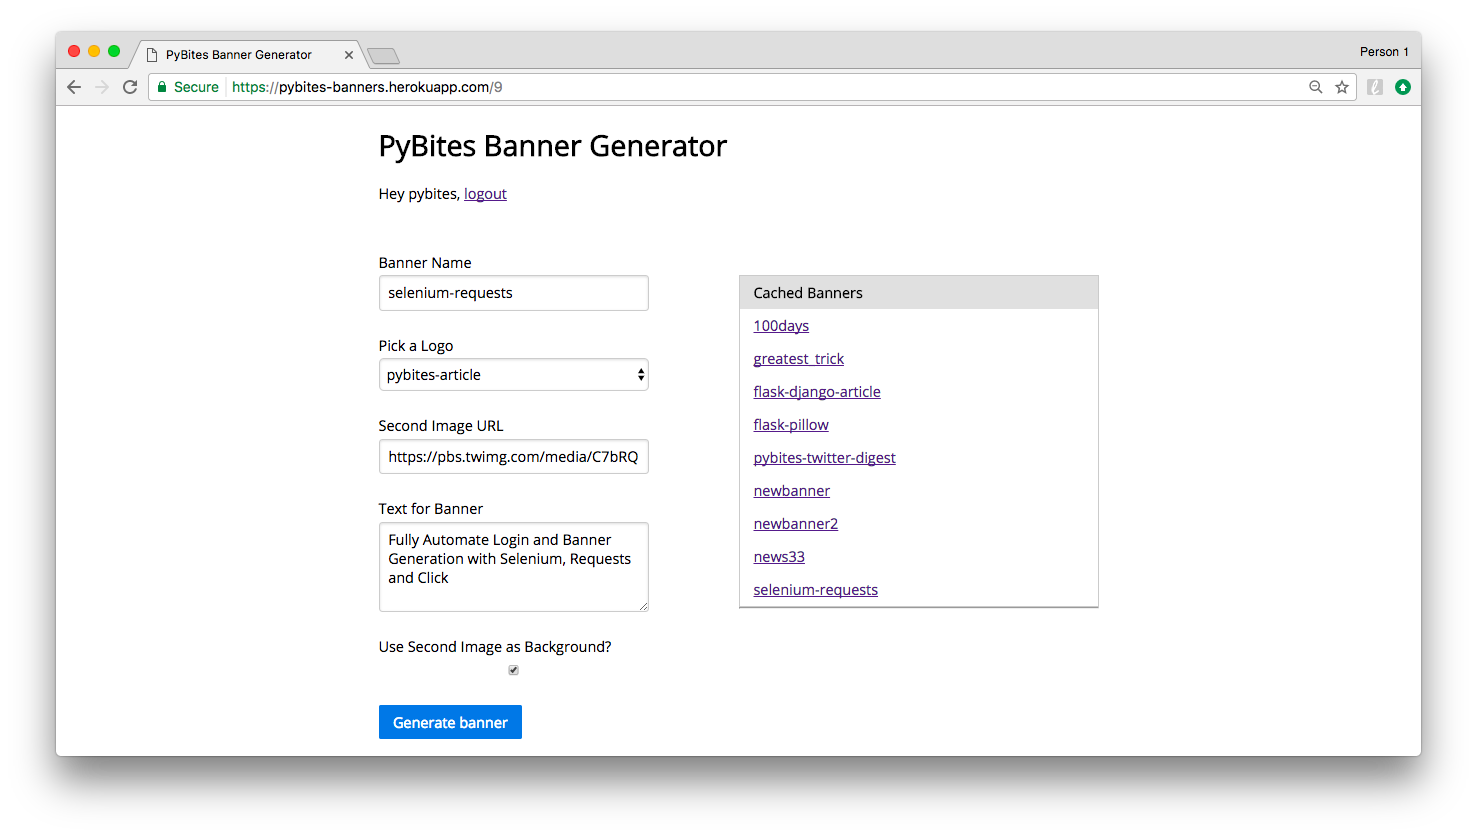
Now imagine using this script to automatically generate 100 banners from a csv file, wouldn’t that be cool?
Further reading
PyBites Banner Generator
-
You can read more about the Pillow code in Part 1 of this tutorial.
-
You can read more about the Flask app in part 2.
Awesome Modules
-
Check them out if not done already:
They are excellent additions to your Python toolkit!
Keep Calm and Code in Python!
— Bob