After watching a PDM Code Clinic demo of PyScript the other day I got a lot of inspiration of things I could do with this new technology.
I always liked working with HTML and CSS because you instantly see the results, something I miss working with pure Python.
However now with PyScript I can combine the 3 making something beautiful that I can almost instantly see in the browser. And it also makes it very easy to share with others (as we’ll see towards the end of this article).
But you might ask yourself: how does PyScript even work?
In this article I will show you by enhancing the demo I saw making it look nicer and explaining it step by step.
For starters this is a “hello world” snippet in PyScript:
<html>
  <head>
    <link rel="stylesheet" href="https://pyscript.net/latest/pyscript.css" />
    <script defer src="https://pyscript.net/latest/pyscript.js"></script>
  </head>
  <body>
    <py-script>
        print('Hello, World!')
    </py-script>
  </body>
</html>
When you execute this you’ll see “Hello, World!” in the browser.
Not too special … or is it? Well, actually it is, because normally you would not see Python code directly in the browser.
Let’s go one step further. The goal is to make a countdown timer counting the time left till the new year. After that we’ll add some more styling (using Bootstrap 5’s Cover template)
The HTML
First I will add a header (h1 element) showing the year we’ll be counting towards. We give it an id of “newyear”.
I am also adding a div element with an id of “showtime” to show the timer. I removed the print for now.
<html>
  <head>
    <link rel="stylesheet" href="https://pyscript.net/latest/pyscript.css" />
    <script defer src="https://pyscript.net/latest/pyscript.js"></script>
  </head>
  <body>
      <h1 id="newyear"></h1>
      <div id="showtime"></div>
    <py-script>
    </py-script>
  </body>
</html>
PyScript packages
Now that we have some HTML we can add some PyScript to our code to add a timer to the mentioned div. Again, any Python code will go inside the <py-script> tag.
For the timer we need some libraries which shows another awesome thing about PyScript: out of the box it works well with Standard Library modules as well as many external packages!
For the latter you’d normally have to make a virtual environment and pip install them, but with PyScript you can just add them inside the <py-config> tag (which supports TOML and JSON) and they magically will be loaded.
We’ll use the following modules / packages: asyncio, datetime (Standard Library) and python-dateutil (PyPI).
The Standard Library ones work upon import, python-dateutil, being an external library, needs to be added to <py-config> first:
<html>
  <head>
    <link rel="stylesheet" href="https://pyscript.net/latest/pyscript.css" />
    <script defer src="https://pyscript.net/latest/pyscript.js"></script>
  </head>
  <body>
      <h1 id="newyear"></h1>
      <div id="showtime"></div>

      <py-config>
        packages = ["python-dateutil"]
      </py-config>

      <py-script>
          import asyncio
          from datetime import datetime as dt
          from dateutil.relativedelta import relativedelta
      </py-script>
  </body>
</html>
PyScript code
For starters the next snippet calculates the new year and writes it to the h1 element.
You can write to the DOM using Element(some_id).write(some_text)
<html>
  <head>
    <link rel="stylesheet" href="https://pyscript.net/latest/pyscript.css" />
    <script defer src="https://pyscript.net/latest/pyscript.js"></script>
  </head>
  <body>
      <h1 id="newyear"></h1>
      <div id="showtime"></div>

      <py-config>
        packages = ["python-dateutil"]
      </py-config>

      <py-script>
          import asyncio
          from datetime import datetime as dt
          from dateutil.relativedelta import relativedelta

          next_year = dt.now().year + 1

          output_year = f"Time left till {next_year} 🍾"
          Element("newyear").write(output_year)
      </py-script>
  </body>
</html>
The countdown timer
Now that we took care of the headline, it’s time to work on the actual timer. The goal is to count down till the next year showing the months, days, hours, minutes and seconds left.
For this we need to use asyncio, a plain sleep will not work (see here + here):
<html>
  <head>
    <link rel="stylesheet" href="https://pyscript.net/latest/pyscript.css" />
    <script defer src="https://pyscript.net/latest/pyscript.js"></script>
  </head>
  <body>
      <h1 id="newyear"></h1>
      <div id="showtime"></div>

      <py-config>
        packages = ["python-dateutil"]
      </py-config>

      <py-script>
          import asyncio
          from datetime import datetime as dt
          from dateutil.relativedelta import relativedelta

          next_year = dt.now().year + 1
          new_year = dt(next_year, 1, 1, 0, 0, 0)

          output_year = f"Time left till {next_year} 🍾"
          Element("newyear").write(output_year)

          async def main():
              while True:
                  td = relativedelta(new_year, dt.now())

                  output = (
                      f"{td.months} months {td.days} days "
                      f"{td.hours} hours {td.minutes} minutes {td.seconds} seconds"
                  )
                  Element("showtime").write(output)

                  await asyncio.sleep(1)

          asyncio.ensure_future(main())
      </py-script>
  </body>
</html>
The timer works and we have made the end result nicer adding some extra HTML and CSS.
You can check out this code on GitHub (going to deeply into the HTML/ CSS is beyond the scope of this article).
And here’s the kicker: you should see a working timer with these 2 simple steps:
$ git clone https://github.com/datwatikmaak/pyscript-countdown-timer.git
$ cd pyscript-countdown-timer
$ open index.html  # or drag the file to your browser
First you’ll see the environment being loaded:
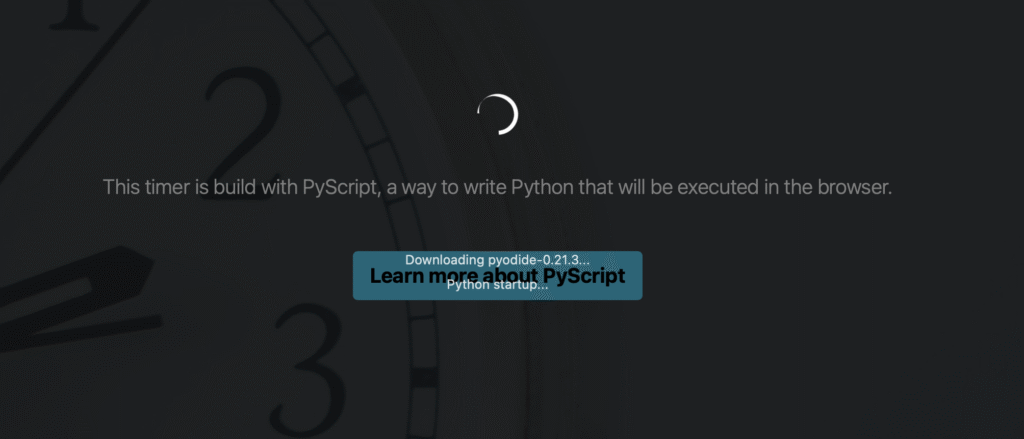
And voilà:
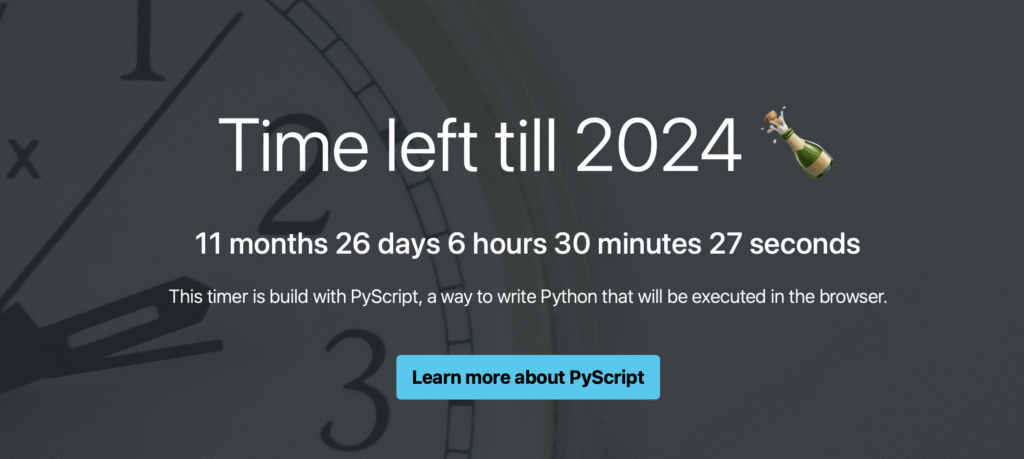
No virtual environment, 0 pip installs, you can just open the html in your browser and it should work, a nice countdown timer 🙂
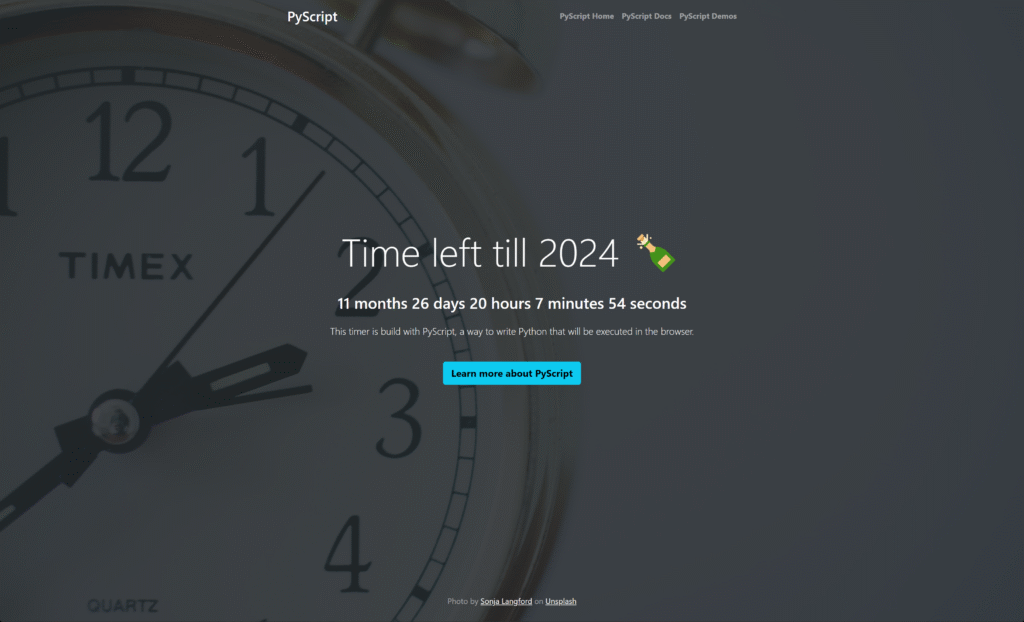
End result
As I said index.html shows the resulting timer. One change I added was making words singular / plural based on the numbers. A small tweak 😉 (and nice Pybites tip actually), but it does make it nicer.
<!DOCTYPE html>
<html lang="en" class="h-100">
<head>
    <meta charset="UTF-8">
    <meta name="viewport" content="width=device-width, initial-scale=1">
    <title>Countdown Timer</title>
    <link href="https://cdn.jsdelivr.net/npm/bootstrap@5.0.2/dist/css/bootstrap.min.css" rel="stylesheet"
          integrity="sha384-EVSTQN3/azprG1Anm3QDgpJLIm9Nao0Yz1ztcQTwFspd3yD65VohhpuuCOmLASjC" crossorigin="anonymous">
    <link rel="stylesheet" href="https://pyscript.net/latest/pyscript.css">
    <link rel="stylesheet" href="styles.css">
    <script defer src="https://pyscript.net/latest/pyscript.js"></script>
</head>
<body class="d-flex h-100 text-center text-white bg-dark">

    <div class="wrapper">

        <div class="cover-container d-flex w-100 h-100 p-3 mx-auto flex-column">

            <header class="mb-auto">
                <div>
                    <h3 class="float-md-start mb-0">PyScript</h3>
                    <nav class="nav nav-masthead justify-content-center float-md-end">
                        <a class="nav-link" href="https://pyscript.net/" target="_blank">PyScript Home</a>
                        <a class="nav-link" href="https://docs.pyscript.net/latest/" target="_blank">PyScript Docs</a>
                        <a class="nav-link" href="https://pyscript.net/examples/" target="_blank">PyScript Demos</a>
                    </nav>
                </div>
            </header>

            <main class="px-3">
                <h1 id="newyear" class="display-1"></h1>
                <h2 id="showtime"></h2>
                <p class="lead mb-3">This timer is build with PyScript, a way to write Python that will be executed in the
                                     browser.</p>
                <p class="lead">
                    <a href="https://pyscript.net/" class="btn btn-lg btn-info fw-bold border-info bg-info" target="_blank">Learn
                                                                                                                            more
                                                                                                                            about
                                                                                                                            PyScript</a>
                </p>
            </main>

            <footer class="mt-auto text-white-50">
                <p class="copyright">Photo by <a
                        href="https://unsplash.com/@sonjalangford?utm_source=unsplash&utm_medium=referral&utm_content=creditCopyText"
                        target="_blank">Sonja
                                    Langford</a>
                                     on <a
                            href="https://unsplash.com/images/things/clock?utm_source=unsplash&utm_medium=referral&utm_content=creditCopyText"
                            target="_blank">Unsplash</a>
                </p>
            </footer>
        </div>
    </div>


    <py-config>
        packages = ["python-dateutil"]
    </py-config>

    <py-script>
            import asyncio
            from datetime import datetime as dt
            from dateutil.relativedelta import relativedelta

            next_year = dt.now().year + 1
            new_year = dt(next_year, 1, 1, 0, 0, 0)

            output_year = f"Time left till {next_year} 🍾"
            Element("newyear").write(output_year)

            async def main():
                while True:
                    td = relativedelta(new_year, dt.now())

                    output = (
                        f"{td.months} month{'' if td.months == 1 else 's'} "
                        f"{td.days} day{'' if td.days == 1 else 's'} "
                        f"{td.hours} hour{'' if td.hours == 1 else 's'} "
                        f"{td.minutes} minute{'' if td.minutes == 1 else 's'} "
                        f"{td.seconds} second{'' if td.seconds == 1 else 's'}"
                    )
                    Element("showtime").write(output)

                    await asyncio.sleep(1)

            asyncio.ensure_future(main())
    </py-script>

</body>
</html>
The styles.css stylesheet with my custom styling:
/* Custom default button */
.btn-secondary,
.btn-secondary:hover,
.btn-secondary:focus {
    color: #333;
    text-shadow: none; /* Prevent inheritance from `body` */
}

.wrapper {
    position: relative;
    height: 100vh;
    width: 100%;
    display: flex;
    align-items: center;
    justify-content: center;
}

.wrapper::before {
    content: ' ';
    display: block;
    position: absolute;
    left: 0;
    top: 0;
    width: 100%;
    height: 100%;
    opacity: 0.15;
    background-image: url('clock.jpg');
    background-repeat: no-repeat;
    background-position: 50% 0;
    background-size: cover;
}


.cover-container {
    position: relative;
    max-width: 60em;
}

.nav-masthead .nav-link {
    padding: .25rem 0;
    font-weight: 700;
    color: rgba(255, 255, 255, .5);
    background-color: transparent;
    border-bottom: .25rem solid transparent;
}

.nav-masthead .nav-link:hover,
.nav-masthead .nav-link:focus {
    border-bottom-color: rgba(255, 255, 255, .25);
}

.nav-masthead .nav-link + .nav-link {
    margin-left: 1rem;
}

.nav-masthead .active {
    color: #fff;
    border-bottom-color: #fff;
}

h1 {
    margin-bottom: 2.5rem;
}

h2 {
    margin-bottom: 1.5rem;
}

a.btn.btn-lg.btn-info.fw-bold.border-info.bg-info {
    margin-top: 2rem;
}

p.copyright > a {
    color: #f5f5f5;
}
And the background image I got from Unsplash.com – credit link: Clock by Sonja Langford
Conclusion
PyScript is a wonderful way to add Python to your HTML and display in your browser. This opens a world of possibilities for any Python developer who can now mix it in with HTML + CSS to build nice things and easily share them with others.
Where you needed JavaScript before, you can now use Python 😎 🐍 🎉
What do you want to make with PyScript? Or did you already build something with PyScript and would you like to share it?
Hit me up on Twitter / Mastodon or in the Pybites community, also for any additional questions.
It has been an honor again to share my JIT Learning Journey with you. See you next time 👋
Leonieke Paalvast